The sauna was borrowed by us from the Finns; there it is extremely popular. Nowadays, it is equipped not only in summer cottages and in their own country houses, most masters create saunas in the apartment with their own hands. Specifications allow you to build a sauna in almost every room. In addition, there is no problem of eliminating water and high humidity, since it is forbidden to pour water in the sauna, due to the elevated temperature.
Types of saunas
The home sauna in the apartment has two options:
- The Finnish sauna cabin in the apartment is already a finished construction, but quite expensive and suitable for very spacious apartments, as it needs to be harmoniously placed indoors.
- Solid sauna built independently. This option makes it possible to arrange a sauna in the apartment according to your desire and provides scope for technical creativity.

Size and location
First you need to calculate the parameters of the future structure and draw up a project. The size of the sauna is selected at its own discretion, starting from the number of visitors. The optimal size for an adult is 2 × 0.7 m.
You can build a sauna in the apartment with your own hands in the bathroom, pantry, or on the balcony - if you install infrared heaters. But the bathroom is the best place for a sauna, because it already has all the necessary utilities.

There is water (hot and cold), a ventilation system and sewage - all that is needed for bath procedures. In addition, the arrangement of a neat sauna in the bathroom does not need to be redeveloped, so coordination with the REU is not required.
Heating devices

Start with heat generators. In a Finnish bath, they are electric heaters. Some difficulty can only be summed up the electricity needed for a heater with a capacity of about 5 kW.
In this case, the owner of the apartment with an electric stove has the most favorable position, the power of which is similar to that of electric furnaces for saunas. Therefore, to connect electricity, you just need to hold the extension cord to the kitchen and plug it into a power outlet.
To connect the heater, you do not need to mount an outlet in the bathroom, and pull the cable along the floor. It is best to install a special tray for it, purchased at an electrical goods store.
The cable in the cab must be secured with a thermostatic hose so that it can withstand high temperatures. Basically, electricity will be consumed approximately as the work of a standard washing machine. Under the oven, make a heat-insulating stand. Do not place the heater near the bathroom or at the same level with it.
Gas stove homes have a more complicated environment. To power the heater, you will need to conduct a special cable from the meter.
Another great option is the infrared sauna in the apartment.

In this case, heaters produce only thermal rays - directly on the person, and do not heat the air. They should be mounted vertically on the sides and in the horizontal plane for the legs - all this is described in detail in the instructions. It is only important to maintain an air gap for ventilation.
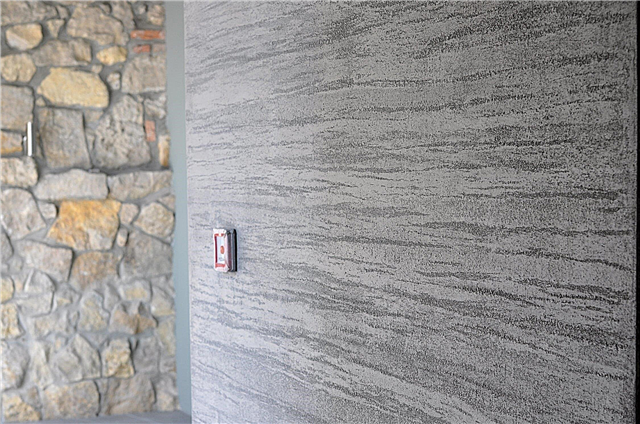
Materials for thermal insulation
The heater power in a small sauna is small, therefore, high-quality thermal insulation of the walls and ceiling is needed. This will make it possible to maintain an appropriate temperature regime with low energy consumption.
For insulation, it is advisable to choose a mineral wool insulation, it is not amenable to temperature influence, and in terms of thermal performance, it loses little to foam. The insulation is placed between the battens of the cladding, which are mounted on the walls and ceiling every 0.5 m. If the insulation is in contact with the brick, then a plastic film should be used for vapor barrier.

If not planks are used as sheathing, but shields having thermal insulation, then the walls can be insulated. Shields consist of natural cork, which is soldered with its own resin. They are characterized by environmental friendliness, and also have good moisture resistance.
It is necessary to mount the material to the frame made of timber.
Ventilation system
Another feature of creating a do-it-yourself sauna in the apartment is the installation of ventilation. The humidity of the heated air in the home sauna is relatively low, but without a good ventilation system, moisture will still enter the apartment. Therefore, it is necessary to provide a system for the rapid removal of excess moisture.

Of course, the rare use of the sauna will not lead to mold, nevertheless, the issue of ventilation should be taken seriously. Ventilation ducts at home should be in good order.
Mounting Features
For fastening the bars, industrial plastic dowels should be used. Corks made of wood can become loose in the future due to the continuous temperature difference.
In order not to have problems with fixing the ceiling, the load-bearing beam must be installed vertically, and the planks should be mounted horizontally. In this case, the sheathed frame acquires the necessary rigidity and perfectly holds the shelves.

To prevent moisture from penetrating the cladding, planks should be mounted with a lap. Finishing the horizontal wall cladding is done from the bottom to the top.

It is advisable to keep a gap of about 4 mm between the foil and the casing, due to which the tree will not get wet due to condensation.
It is more expedient to place the shelves above the bathtub, fix it on the hinges so that it would be possible to raise the structure. The height of the shelf must be designed so that family members, while sitting, do not rest their heads on the ceiling.
Door installation
The door design can have a variety of options. It can be a device with Velcro, a coupe or an ordinary hinged canvas with hinges - everything depends on the budget and imagination. It is important to make the entrance to the sauna airtight to create good thermal insulation.
In an infrared sauna, it is advisable to install a glass modern door. For a sauna with a stove, a wooden door is required, insulated with foil inside. In order for the door to adjoin the box tightly, it is necessary to make three-stage edges of the jamb. A glass door uses a heat-resistant silicone sealant.

Sauna equipment
The internal equipment of the sauna consists of:
- beds,
- foot rests
- head restraints
- support for the back.
All this should be made of wood with low thermal conductivity. In this case, there is no danger of getting burned while sitting or lying on the shelf. Abroad, the internal equipment of saunas is made from the African Abachi tree. We use spruce, linden, aspen or pine. Shelves, supports, control panels and footrests are sold in specialized stores.

That's all the features of the sauna in the apartment! Pleasant and healthy procedures without leaving your home will pay off all the work and expenses.
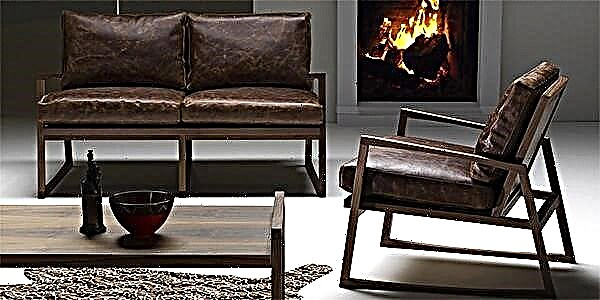
Below you can see a photo of the sauna in the apartment: in the bathroom, in the room, on the balcony
Conditions for the construction of a home bath
The first step is to choose a place for the steam room and create a project - it can be placed in the pantry, take part of the corridor, many mount the cabin on the loggia and balcony. If the area allows, then it is installed in the bathroom, replacing the main plumbing with a shower. This is the best option, since a steam room requires water supply, sewage and exhaust.
Dimensions are calculated taking into account the fact that there should be about 2.5 square meters per person, but you can also mount a mini bath with dimensions of 1.5x1.5. In this case, the ceiling height should be 2 meters. However, a fire certificate is required for a home sauna, as well as compliance with established safety requirements.
An important point is the choice of a furnace equipped with automatic shutdown at a certain temperature, the power of which should be at least 4.5 kW. In addition, fire sprayers can be mounted along the cab borders - for this, they carefully consider connecting to water pipes, and the steam room is protected with waterproofing materials.
Benefits of a Home Sauna
It will be about a city apartment, because with suburban housing everything is a little simpler. A bathhouse is usually built on a summer cottage - a detached house with several compartments, one of which is just occupied by a sauna or steam room.

Typically, typical housing is equipped with a bathroom with a shower or bath. Usually this is enough to follow your own hygiene: lovers to soak in water choose a bath, and those who are constantly in a hurry choose a shower.
It seems that everything suits, why then do you need a sauna? Why in almost every second Finnish apartment there is a separate room with a temperature reaching 100ºС?
In fact, a sauna is a place where you can put your body, thoughts, and emotions in order. The relaxation that occurs after visiting the steam room can be compared to a professional massage: all muscles and organs rest.
It is scientifically proven that regulars of paired have a more stable immunity, a positive attitude, excellent physical shape and are much less likely to get sick. Even the above is enough to understand why many can not imagine life without a "hot" rest.

Choosing a place: bath, kitchen or balcony?
When you live in a private house, there is not such a strict choice - with the same success you can use the basement, and the attic, and the extension, and one of the free rooms.
In a city apartment, everything is different: the attic and basement are public (although in the same Finland it is these rooms that are equipped with a sauna for the whole house), it is forbidden to use them for own needs (only for storing things, and even not in all houses).
It is possible to build an extension - but this applies only to residents of the 1st floor, and construction on the central streets is prohibited, and for peripheral houses a lot of approvals, and therefore money, will be required.

We turn to legal documents and see what is permitted by law. It turns out that placing saunas in living rooms and kitchens is strictly forbidden (by the way, the ban also applies to cellars of high-rise buildings). Remain - a balcony (loggia), a corridor or a bathroom.
If you live in the north, the balcony will require high-quality insulation, as the outer wall of the house usually freezes. The corridor needs redevelopment, and even then, if it has sufficient area. The storage room is usually used as a dressing room - this frees up living space from bulky cabinets.
Thus, a sauna in the bathroom should be considered a more rational solution, provided that if the footage and legal standards allow, which will have to get to know better.
Are permits required?
When reconstruction works are planned in an urban residential building, one must remember the regulatory documents that dictate special conditions. This also applies to the sauna - its construction is allowed, but there are a number of regulatory rules and restrictions.

There is a lot of useful information, without knowing which in the future you can get an administrative penalty.
In wooden apartment buildings (1-2-story), the construction of a sauna is strictly prohibited, and in monolithic or brick with reinforced concrete floors, regardless of the number of storeys and the number of entrances, it is allowed.

The stove should not be gas or wood, but must be electric - this is also a necessary condition. Accordingly, it is necessary to conduct a three-phase type power cable into the room.
Any violation (firewood, lack of protective shutdown) is punishable by a fine, followed by correction of defects.
A number of requirements relate to the premises themselves. For example, if you have a studio apartment with an area of less than 38 m², you can say goodbye to the idea of a home sauna.
The area regulations apply to “kopecks” and “three rubles”: a two-room apartment - at least 54 m², a three-room apartment - 68 m². The area of the steam room itself is small.

One of the requirements relates to the materials of which the sauna skin is made. It should be environmentally friendly wood, processed from fungus and mold.
Preference is given to aspen, linden, oak, that is, hardwood. The wooden frame must necessarily be equipped with a fire fighting device. Usually this is a pipe with many holes, fixed by the type of cornice (along the perimeter of the ceiling).
It is assumed that, in case of fire, spraying water from the holes should extinguish the fire and prevent a fire in the apartment.
In addition, it is necessary to fix a fire detector on the ceiling, in the event of force majeure circumstances, transmitting a signal to the Ministry of Emergencies.

Before visiting the BTI, you need to collect a package of documents, which includes copies of documents for the apartment, a floor plan, an extract from the house book with a copy of the personal account, a drawing of redevelopment or other design changes (usually performed by a licensed construction company).
Get ready that it will take a lot of patience, time and effort to visit the following authorities (without guarantee of approval):
- fire service
- Homeowners Association or another housing company in charge of your home,
- Housing Inspectorate
- Rospotrebnadzor Department,
- SES
- inspection of architectural and construction supervision.
This list is not final, as the number of approvals depends on a specific region. Remember that a conversion permit is required even if you want to install a purchased sauna cubicle instead of a shower cubicle.
Which sauna is better for an apartment?
At first glance it seems that apartment saunas are not in demand, therefore, the choice is not so big. In fact, thanks to fans of hot steam and dry heat from the Scandinavian countries, the range of factory models is quite diverse.
To begin with, all designs can be divided into 3 large groups:
- ready-made models of prefabricated prefabricated type (from lining or panels), with technical passport, warranty and professional installation,
- frames made to order according to the provided sketch (indicating the size, type of furnace, number of seats, etc.),
- buildings made independently according to ready-made or personally drawn up drawings.
For the operation of the first type, along with you, the manufacturer is responsible, and the remaining two points are solely on your conscience.
If flooding or fire occurs, as a result of which the residents of neighboring apartments will suffer, an administrative violation will smoothly turn into a criminal case - we advise you to consider all possible risks.
Residents of the private sector are much easier - if anyone suffers, then only the owner of the premises and his family.
Recommendations from professionals - in the following video clip:
Cabin with electric oven

The installation of such a cabin (as well as another type of sauna) is considered as a re-equipment of the bathroom, as modernization of communications will be required. Accordingly, the collection of permits cannot be avoided.
There is a tricky way to simplify installation: instead of reinstalling pipes, use flexible hoses - then a visit to the authorities will not be required. All technical guarantees, as mentioned above, are undertaken by the manufacturer.
Infrared model
The last few years have shown that this is the best solution specifically for indoor use.

Like the hot humid air of the steam room, they remove toxins and excess fluid from the body, stimulate the work of all organs.
Compact mini-sauna ("barrel")
A great alternative to the classic version if there is a shortage of free space in the bathroom.
Any free angle is suitable for installing a mini-sauna in the bathroom: it is no higher than human height in height and its area does not exceed 1 m ³. The power of the heating device is approximately 2 kW.
Cedar wood models with a built-in steam generator are common.

Despite its small size and simple operation, it is better to entrust the installation to a company engaged in the implementation of compact saunas.
The control is facilitated by a convenient remote control; some models are equipped with additional devices that make the procedure more pleasant, for example, with a balm sprayer.
Hamam - Turkish steam room
For the construction of an exotic hamam for our country, not every apartment is suitable. We do not even consider standard 2-3-room options, however, two-story housing with a separate entrance and a large area is quite suitable.

The room should be completely isolated from other rooms, equipped with a good extractor fan, sewer, hot and cold water supply.
This is a good option for detached cottages for 2-4 families with free space.
Types of steam rooms for an apartment
A dry Finnish sauna will be the best option as an apartment steam room. The reason is simple - to equip a classic Russian bath in the apartment, you need to additionally equip the drainage of water and steam, and heating equipment using solid fuel in most homes is prohibited. Of course, ardent steam men say that a home sauna is a pale copy of a Russian wood-fired bathhouse. However, this does not prevent mini-steam rooms from gaining popularity, especially since more and more new types are constantly appearing.
Apartment steam rooms look like small cabins such as showers, sometimes combined with them, in which an appropriate microclimate is created.
In the same cabin, it is possible to adjust a different microclimate on the health of each member of the family. As a rule, no more than 2-3 people can steam in a steam room at the same time (depending on size). Such structures are heated by electric furnaces or infrared emitters.


Saunas differ in size, power, type of heater. In addition, they are ready-made and home-made, stationary and portable. Portable steam rooms are a great option for small rooms.
Two types of portable steam rooms are best known.
- Phytobarrels - These are miniature saunas for one person, made in the form of a barrel. The heating element is inside. Unlike stationary structures, in the phytobarrel only the body is exposed, while the head remains outside. In addition, such barrels are equipped with special tanks for herbal tinctures, which many times increase the usefulness of the procedure.
- Fabric sauna It is a wooden frame, covered with a special fabric. This type is very convenient in terms of storage: after use, the sauna easily rolls up and hides. Use it only with a powerful heater, since heat loss is much higher than other types.


Ready-made stationary booths are the way for those who are interested in quick installation and a minimum of related work. They are found in the form of separate cabins or cabins connected to a shower partition or two in one. The disadvantages of such equipment are standard sizes, which are quite difficult to choose for a particular room, especially if every meter counts. The consumer is able to change his mind and the price of the product. Nevertheless, a limited budget is not a reason to abandon a dream, but an opportunity to test your design abilities.

Selection and preparation of premises
The first step in building a home sauna is to carefully choose a room.
A suitable place in the apartment must meet several requirements, possessing the following qualities:
- good heat and waterproofing,
- ventilation,
- access to main communications: electricity, water supply, sewerage.


The construction of the steam room in the living rooms is prohibited for security reasons, so the best place is the bathroom.
In it, just all of the specified requirements are met. You can also use the kitchen for these purposes. Often the dimensions of a standard kitchen and bathroom do not allow one to allocate a few extra square meters, therefore, most likely, redevelopment of the apartment, ventilation equipment from scratch, and communications are required.
This entails the need to coordinate the project with a number of state authorities:
- fire service
- epidemiological service
- redevelopment and approval service,
- Housing Inspectorate.


Additionally, it may be necessary to modernize the power supply of the apartment, since standard wiring, most likely, will not withstand the load of a powerful heater. In this case, the permit is issued by the electric supplier and the contract for work is concluded with him.
Choosing a smaller stove will save on wiring replacement, but will increase the time for heating the sauna to the desired temperature. Alternatively, it is possible to enhance the thermal insulation of the cab and reduce its volume.
When work with electricity is completed, the relay goes to ventilation. If it comes to the bathroom, then the ventilation system is provided here initially. All you need to do is check and clean it. Holes must be made on the sauna cabin itself. If desired, they can be equipped with heat-resistant fans and dampers. In the case of using other rooms, it will be necessary to carry out additional ventilation ducts. A flexible duct is quite suitable for this, while unnecessary bends should be avoided and the shortest straight path should be chosen.

There is a fundamentally wrong opinion that this stage can be skipped, supposedly the sauna works without ventilation. In fact, it will not last that long: under the constant influence of moisture in an unventilated room, rotting of wooden structures begins, a favorable environment for the development of bacteria is formed, the quality of bathing procedures under such conditions is no longer necessary.
In addition, there is a risk of acne without an influx of fresh air.


Among the common mistakes when installing ventilation, there are also those that completely cross out the advantages of your own bath.
- Planning and installation at the end of construction. Remaking the finished product is more difficult than initially envisioning an air exchange system.
- Complete tightness of the sauna. Any room, regardless of purpose, needs a natural influx of fresh air.
- Equipment of only one exhaust vent. If there is no air flow, then there can be no talk of air exchange.
- The absence of dampers on the inlet / outlet valves that help regulate the microclimate in the steam room.
- The location of the holes on the same level and opposite each other. As a result, air will be distilled from one valve to another, forming drafts and not providing mixing of air masses.
As for the size of the future mini-steam room, then take into account the indicator, according to which on average 2 m2 per person is necessary, if the presence of a bed is necessary.


Material and equipment selection
Materials for a sauna or bath should be environmentally friendly and non-toxic. This is an urgent need, since when heated, many materials emit substances harmful to health. Therefore, the number one in the list of necessary materials will be natural wood for the frame and lining. It is desirable to use one type of wood, then the design will have the same performance properties.
Best suited for apartment mini-saunas, aspen, linden and Abachi oak. The latter, it seems, has grown specifically for such purposes: it does not conduct and does not absorb heat, practically does not absorb water, is resistant to mechanical stress, and does not emit tarry substances. Steam rooms are often finished with Scandinavian pine and spruce, alder, aspen. In general, for rooms with high humidity, it is better to use harder wood species, and those that are softer will fit for external cladding.


Precautions must be taken to prevent the escape of precious heat through the walls of the structure. Do not rely only on the low thermal conductivity of the tree, it is better to additionally stock up with environmentally friendly and non-combustible insulation, for example, felt insulator or basalt slabs. Felt has the property of easily absorbing and giving water without changing its properties, and insulation from basalt slabs completely repels moisture. You can look at other materials available on the market. The main condition is environmental friendliness and immunity to moisture.
Where there is insulation, there is waterproofing. You can choose a material that performs both functions at once, or purchase glassine or foil paper.


It is likely that the inner wood paneling will need to be treated with an impregnation that protects from the damaging effects of moisture and steam.
To finish the floor, it is recommended to purchase ceramic tiles. The coating can be either wood or any other, the main thing is to avoid synthetic materials (for example, linoleum), which, when heated, emit harmful substances.
Of electric ovens, only those that are designed specifically for wet rooms are suitable. This device is the central figure of a home sauna, you should not save on it. Power is selected depending on the size of the steam room. On the issue of heating appliances, customers trust the Scandinavian and German models, which combine the necessary power, reliability and lightness.
The main stages of installation
- Before starting work, all wooden parts are treated with protective impregnations and left to dry.
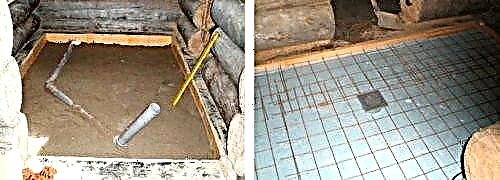
- Device floor. This step is not necessary if the sauna is being built in the bathroom, since the existing tile is quite suitable. Otherwise, the floor is made from scratch, that is, sewer, hydro and thermal insulation are installed, a warm floor (if desired), a concrete screed. Ceramic tiles are laid immediately after the screed has dried, before the frame and walls are erected.
- Then the walls are prepared, to which the sauna will adjoin: the old coating is removed, the surface is treated with antifungal and antiseptic preparations, with the help of strips, 2-3 layers of glassine are fixed, protecting the main walls of the apartment from steam and moisture. For waterproofing, special polymer mastics are sometimes used.

- The next to build a vertical and ceiling frame. To do this, use a bar 4 * 6 cm or 5 * 5 cm. The height of the structure is at least 2 m. If the exhaust valve is planned on the roof of the cabin, a gap of 5 cm is left between the ceiling of the apartment and the steam room. Frame frames are made around future ventilation openings. The doorway is decorated with uprights.
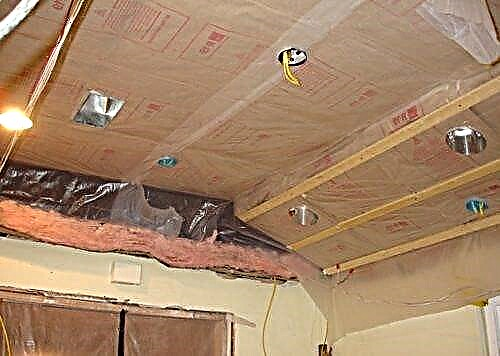
- Warming. A popular material is basalt wool, which is carefully laid between the bars of the frame.
- Thermal insulating material is fixed on top of the insulation, as a rule, it is aluminum foil. The foil sheets are laid with the mirrored side inward, overlapping 10-15 cm, and glued with metallic tape.
- Installation of horizontal lathing before cladding lining. To do this, use thin bars 3 * 4 cm, which are mounted in increments of 40 cm.
- Cladding walls and ceiling clapboard. Start work from the ceiling, from the entrance to the opposite wall. At the same stage, the inlet and outlet ventilation valves with shutters are installed.
- Installation of shops. The support is made of timber, for greater reliability of the structure, a vertical stand is added. It is laid with the same material used for the walls.
- The door is most often made of frosted tempered glass. This helps to avoid the effect of confined spaces. The door should open outward, easily and effortlessly, so no major locks are set, maximum is a magnetic latch.
- Installation of equipment. The stove is installed in a convenient place, in a special fence made of leftover wood. This is done to protect against burns in a small space. Lamps are selected heat-resistant, they are mounted on top of the lining.
- Outside, the sauna is decorated with clapboard.
Before the first use, the steam room is dried. To do this, the room is heated for several days, gradually increasing the temperature and heating time.
On the first day, heating is turned on for an hour with open doors, on the second day they withstand 3-4 hours at 60 degrees, in the following at 90-100 degrees. After checking the operation of the equipment and ventilation, the sauna is ready for use.
Finnish sauna is not the only possible option for an apartment steam room. If you wish, you can equip a Turkish hammam with your own hands in an apartment building. This type of bath is characterized by absolute humidity and low temperature (no more than 50 degrees).
Tips for installing a steam room in the apartment, see the next video.
Steam room design
Steam room - a relatively small room, usually without windows, including several mandatory characteristic elements:
- a stove-heater - only this option allows you to get steam in the bath, water, breaking on the surface of hot stones, crumbles with the smallest spray, they create the so-called light steam,
- shelves - wooden platforms on which they sit and lie during the procedure, their size affects the size of the steam room,
- ventilation - the air flow is ensured by ventilation holes, if the steam room in the bath is large, it is possible to install a hood, but such a solution is considered disadvantageous.
The optimal size of the steam room in the bath
When planning a bath, first of all, the sizes of the steam room and the dressing room are determined. Doing this “by eye” is not recommended. There are a number of standards that should be followed:
- the size of the steam room in the bath is determined by the maximum number of users - at a rate of 0.7 square meters per person in a steam room m, deviation is allowed for small baths, if they have seating shelves,
- the optimal size of the steam room also depends on the growth of the highest member of the family, the height of the room should exceed this value by at least 20 cm, even the tallest user should not touch the ceiling with his head if he is sitting on the top shelf,
- excessive height is also disadvantageous: warm air rises upward and if the steam room is too high, then it will take too much power to warm it up, the steam room is considered to be optimal at 2.2–2.4 m,
- the location on the sunbeds also matters if sitting shelves are supposed, then the steam room can be made smaller, if the soaring ones are lying, then the area of the shelves should be sufficient to accommodate everyone, the minimum width of the steam room will be 20 cm more than the height the highest user
- another factor determining the dimensions of the steam room is the dimensions and nature of the stove, the metal stove is quite compact, however, its body is literally heated, so it is positioned so that a certain distance is maintained from the stove to the shelf and walls, the stone stove does not burn, but it is noticeably larger in sizes, an electric heater requires a lot of electricity - this option is not suitable for a large steam room.
Size of the steam room for 2 people
Based on these factors, you can calculate the optimal size of a steam room for 2 people:
- experts believe that at least one side of even the smallest steam room should reach 2 m, thus compensating for the impression of a cramped and uncomfortable room, the dimensions of the second wall are determined by the owner,
- The "useful" area of the steam room, that is, shelves, should be at least 1.4-0.7 square meters. m per person, the total area of the steam room includes free space in front of the shelves at least 50 cm wide and a place for a heater, the dimensions of the latter are decisive,
- in general, the recommended size of the steam room for two people is 1.8 m per 1, 4 m.

Dimensions of the steam room for 3 people
If for 2 people sunbeds can be placed one above the other, saving space, then for 3 people they will have to be installed in the form of the letter “G”, which immediately increases the size of the steam room by 3 people. The configuration and dimensions of the steam room in the bath are calculated taking into account the following parameters:
- it is best to install along the 1 wall of the bath 2 shelves one above the other and 1 shelf along the second wall,
- if the height of each user is 1.7–1.8 m, then the length of each shelf in the steam room must be at least 1 m, the width is at least 50 cm,
- placement in the form of the letter "G" is very convenient in that it automatically frees up space even for a brick heater in the bathhouse - at least 1 square meter. m
The optimal size of the steam room is 2 * 2 m, that is, at least 4 square meters. m
Sizes of the steam room for 4 people
In this case, the shelves can be placed in different ways, which allows you to vary the size of the steam room for 4 people:
- if you mount the beds also in the form of the letter "G", then the size of the steam room in the bath does not change - 2 * 2 m,
- can be placed 2 shelves one above the other on opposite walls of the steam room. In this case, the heater is placed between the benches. That is, with a shelf width of 50 cm and a furnace size of up to 1 square. m, the length of the second wall of the steam room will be 2.5 m, since according to the standards the furnace body should not come in contact with wooden walls and benches, in this case the optimal dimensions of the steam room are 2 * 2.5 m.
In such a steam room window arrangement is allowed. You need to place them as low as possible so that the warm air in the bath cools less.

DIY steam room: photo
The design of the steam rooms is not very diverse - this is a functional room of the bath, always trimmed with wood, since no other material is suitable for the steam room. The difference in design is the configuration and placement of shelves, lighting, dimensions and, of course, the shape and design of the heater.
The steam room in the real log house looks the most authentic. In this case, there is no additional decoration, and the highlight of the design is the log walls themselves. Shelves and benches in the bathhouse are deliberately rude, a brick stove is being built.

The steam room looks less ethnically, trimmed with linden or cedar smooth boards with a plank bed made of the same material. The design of the bathhouse is complemented by illuminated wooden decorative elements, brooms and wooden buckets. Here the heater can be both brick and metal.

The Art Nouveau bathhouse includes a decorative panel of log cabins, wooden bricks, wood chips.

The most exotic look of the steam room in the bath is given by the backlight. By varying the color of the radiation and the location of the fixtures, amazing results can be achieved.

Steam room arrangement
In order for the steam room to serve for a long time, and the bathhouse has always been beneficial, reliable materials should be used in the arrangement. There are many requirements and they must be strictly fulfilled:
- sheathing - polished boards, lining, imitation of timber, it is allowed to use only wood in the bathhouse and that which does not withstand steam and does not heat up too much: linden, aspen, black alder, ash, only cedar is suitable for coniferous varieties, since the rest emit tar too much when heated,
- thermal insulation is an absolutely necessary element for a bath, mineral wool is most often used, when installing a steam room it is better to use foil mineral wool, since it better protects the material from the action of water, foam is not recommended in the steam room, because it emits harmful substances under the influence of temperature and is quite collapses quickly
- waterproofing - preference is given to foil materials: aluminum foil, foamed penoizol or glassine, this option not only protects against moisture, but also reflects heat back to the steam room, which allows heating the room at a lower cost,
- vapor barrier - allows you to remove air, but prevents contact with water. For the bath, you can use a polypropylene film or kraft paper. However, it is better to use modern developments: membrane variation, foil based on kraft paper or on a fiberglass basis,
- pipes for ventilation of the bathhouse - are absolutely necessary for supplying air to the furnace and ensuring its circulation in the room, ventilation pipes in the steam room are installed plastic, the main thing is to correctly calculate their sizes.
When installing a steam room in the bathhouse, the future owner independently chooses the best material, taking into account the size of the room, the material of the structure and its capabilities.
How to make a steam room in the bath
Arrangement of a steam room in a Russian bath includes several stages:
- the layout of the steam room - the choice of the heater, the location of the shelves, the lighting method, etc.
- calculation and ventilation device - its type is determined by the size of the steam room in the bath,
- waterproofing and thermal insulation of walls and ceilings in the bathhouse,
- installation of a heater - if a brick stove is being built, then the work is done even before the walls of the steam room are insulated, in addition, for a furnace of this mass, a concrete base will be required
- steam room decoration - lining with clapboard or trim boards.
Last of all, place shelves, arrange the bath in the chosen style. The backlight is mounted according to type. For example, a lateral fiber is laid on top of the trim, and built-in or LED - before the skin.
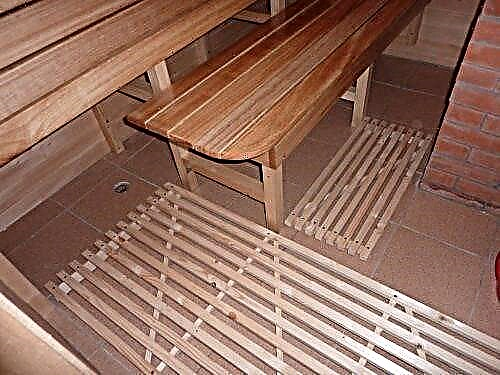
Floor mounting
The standard most reliable option for the floor in the bath is a concrete base, covered with wooden flooring. It is also possible to finish the concrete floor with tiles or porcelain tiles. In this case, wooden ladders are laid, since the tile heats and cools too much.
First of all, you should choose the type of floor for the bath - dry or pouring:
- dry - a concrete slope is built under the steam room under the slope, while the steam room has a drain hole, where condensate and water go, it is collected in pipes and discharged into a septic tank or drainage field,
- pouring - gaps remain between the floorboards and the water goes through them into the underfloor, either a drainage cushion is placed below, where water is distributed and absorbed by the soil, or again it is collected through a drainage hole into a pipe and discharged into a drainage hole near the bathhouse.


The pouring floor in the steam room is much easier to arrange. However, this option can only be performed on sandy soils, since such soil easily absorbs large volumes of water.
- A layer of up to 30 cm thick is removed from the ground. A layer of sand with a thickness of 10-15 cm and a layer of gravel - also 15 cm, are poured into the resulting trench and compacted.
- Wooden logs are laid at a distance of 10-15 cm from the crushed stone layer, previously treated with antiseptics.

- On the logs, wooden flooring boards are attached. Between the boards leave a gap of 2-3 cm.


Dry floor in the bathhouse is much more difficult to arrange.
- Previously, from the cesspool to the future steam room, a sewer pipe is laid in the bathhouse and brought to the discharge level.
- After the sand and gravel layer has been formed, the future floor is poured with a concrete screed of 15 cm. If necessary, it is reinforced with a steel mesh.

- It is recommended to fill in 2 stages, which, of course, greatly lengthens the working time in order to perform additional floor insulation. For this, waterproofing is rolled out over the first concrete layer - roofing felt, insulation is laid, 5 cm thick, covered with a film, reinforced and reinforced with concrete.
- Then the concrete is tiled and wooden lattices for the floor are laid - ladders.


Vapor barrier and ceiling decoration
In the steam room device, thermal insulation of the ceiling is more important than floor insulation. Heated air rises, and if there is no barrier in the form of a heat-insulating layer, it transfers heat to the cold roof.
- Finishing the ceiling surface in the bath begins with laying a wooden crate with a pitch of 2 cm less than the width of the insulating material. Reiki for her needs to be treated with antiseptics. Waterproofing is fixed to the crate - film, penoizol.
- Between the bars lay mineral wool.

- The insulation is covered with vapor barrier, preferably foil. Joints are sealed with metal tape.

- On top of the vapor barrier fix the crate. The direction of the rails is perpendicular to the direction of the bars in the crate.
- Boards or lining are fixed to the crate. A layer of air remains between the vapor barrier and the finish.

- When decorating a steam room, the presence of a chimney should be taken into account. For him, make a hole in the rough flooring, heat-insulating "cake" and decoration. In addition, here it is necessary to arrange fire protection: thermal insulation of the chimney pipe, pipe for the passage of the ceiling.


If the bathhouse has a sub-space, you can insulate the ceiling from the back, by filling the floor in the attic with expanded clay.
Efficient ventilation
The ventilation device for the Russian steam room and sauna is very different. Volley ventilation is quite enough for a Russian bath: if the door is open in between procedures, then this is enough. But then, opposite the sash, a window should be arranged.

Otherwise, it is worthwhile to form ventilation using two pieces of asbestos-cement pipe. To do this, at the level of the blower, the stoves in the nearest wall make a hole for the air flow. It is better to install the pipe, as it is more resistant to moisture.
An exhaust hole in the steam room is made at the level of the shelves in order to improve air circulation and achieve traction.
As a rule, forced ventilation in the bathhouse is required only in cases where preliminary calculations were made incorrectly.
Electricity
When installing a steam room with your own hands, you should take care of the lighting. If an electric fireplace is used, cabling becomes a necessity.
This problem is solved in 2 ways:
- ideally, there should be no pair wiring, since the cable’s contact with moist air is unacceptable, so the best solution is to lay the wire through the wall to the point where the lamp is fixed or the electric furnace is installed,
- if this option is not feasible, the cable is laid on the wall behind the steam room finish, while you need to use special heat-resistant wires and additionally protect them with PVC corrugation.
Cable characteristics are determined by needs: for lighting, for a heater.
Wall insulation
The thermal insulation of the walls in the bath is determined by the material of the structure.
If we are talking about a log house or a structure from a profiled beam of good thickness, then the walls do not need special thermal insulation. It is quite enough to fix a layer of thermal insulation or foamed foam insulation on the walls. Then the crate is fixed, finishing boards or lining are fixed on top of it.

If the bathhouse is frame, for example, then the insulation is organized according to the same scheme as the process of ceiling insulation described above. The difference is only the number and size of the holes: it will be necessary to form ventilation vents and an opening for the furnace in the steam room, if it is built-in.
The thickness of the insulating layer is calculated depending on the load: the colder the winters in the region, the thicker the insulation.
Furnace installation
The installation of the furnace depends on its type.
An electric heater is installed on the floor or mounted on the wall in any selected steam room. In this case, a chimney is not needed, but you need to lay a cable through the wall to connect the device.
A brick oven is laid at the stage of laying the foundation of the bath. With your own hands, such a construction can be done only with certain experience.
A metal furnace is installed as follows.
- A metal sheet is placed on the floor of the steam room, exceeding the perimeter of the body by 20 cm.
- Stir the oven and brick. If this option does not fit, brick the wall around this site. On average, the dimensions of the lining exceed the dimensions of the hull by 20 cm.
- A hole is formed in the ceiling for the chimney. The ceiling in the steam room and in the under-floor space is covered with metal. The pipe must be placed in a metal pipe with thermal insulation to avoid contact between the chimney and the wooden material.
- Then, the gate and chimney are mounted on the furnace.

If necessary, fix the heating tank to the pipe. In this case, you will need to make holes in the ceiling of the steam room and for pipes supplying and discharging water.
Door mounting
As a rule, wooden doors are installed in a steam room, although glass doors are often used in a modern interior. However, such a model is very difficult to install and will require the participation of specialists.
The main task of the sash is to ensure tight closing so as not to release heat from the steam room. Installing it involves several steps.
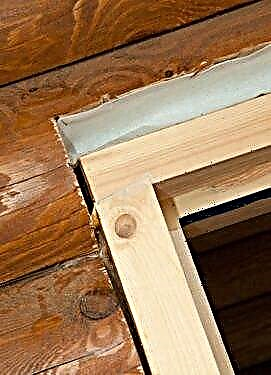
- A pigtail is built according to the size of the doorway - a rectangular casing that eliminates the shrinkage of the walls. To do this, a thorn is cut out on the ends of the beam, and a recess of the same size is cut in the casing. When installing between the casing and the wall, a jute or tow is placed.

- First, the casing threshold is fixed, then the side parts and the upper one. A gap of 3-5 cm remains between the upper crossbar and the opening.
- A wooden sash is mounted in the usual way on the casing.


If desired, the opening can be decorated with decorative platbands.
How to make shelves correctly
A steam room in the bathhouse can not do without shelves. The shape and size depend on the area of the steam room and the number of future users. The length and width of the sitting shelf is 40 cm. A more convenient option is the length of 60 cm. If the lounger is supposed to be located with bent knees, its minimum length is 150 cm. The size of the recumbent reaches 2 m.
- They build either two- or three-tier shelves. The distance between them is 35 cm.
- The size and the selected form are collected frame, usually from larch. The design is fixed to the steam room wall. For reliability, inclined supports are installed.
- They assemble boards from linden or aspen boards with a width of 5 cm. There should be a gap of 1 cm between the boards.
- Shields are fixed to the frame.

You can not use conifers for shields, unlike the frame, because it releases a large amount of resin.
Conclusion
A do-it-yourself steam room, a step-by-step instruction for which includes installing a floor, installing a stove and thermal insulation requirements, allows you to cope with this work in fairly simple conditions. If, for example, complex materials are used to decorate the bath, and the room should fulfill the role of a steam room and a sauna, the help of specialists and more sophisticated equipment will be needed.
Do-it-yourself steam sauna
To build a sauna in the bathroom, you will need 1.5-2 m² of free angular area, wooden bars and lining, an electric oven or an IR heater, an electric cable, and fixing material.
First of all, even before the frame is assembled, it is necessary to draw a separate line of electrical communications, more precisely, two lines: one is for powering the stove, the second is for lighting. All wires should be placed on the outside of the structure in a specially insulated sleeve.
Make sure that the wires are new, even, without twists and kinks - this is a guarantee of safety. The power of the IR heater is 1.5-2 kW, of electric furnaces - from 3 kW.

Bright lighting is not required, as rest and relaxation imply a calm, soft light.For a small area, one built-in lamp 40-60 watts is suitable.
In addition, take care of ventilation in advance. The hood is recommended to be embedded in the wall opposite to the one in which the stove is located.
A hole in the ceiling on the opposite side is also suitable.

You will need thick bars-supports 50 x 50 mm in size, some of which are installed vertically, others - horizontally (for ligament and fixation). The adjacent supports are connected by 3-4 transverse parts.
For the ceiling perimeter, boards are used instead of beams. The door frame is also assembled from beams, in the upper part leaving room for lining. To finish the floor, use either hardwood or ceramics (as in the whole room).

Polyfoam or polystyrene foam is not used as a heater for a home sauna, since when heated, it is possible to release volatile components that are harmful to health.

The walls and ceiling lined with insulation are covered with a crate of thin beams of 20x40 mm. The lathing will serve as the basis for the finishing of the lining.

After facing the outer and inner parts, you can proceed to equip the door.

At the end of construction work, they proceed to the manufacture of benches, which are located along one wall in the form of a ladder. For a small booth, two shops are enough.

Pay attention to the location of the fasteners - all self-tapping screws and bolts must be attached from the bottom, as the metal can cause burns when heated.

For safety reasons, the electric oven is fenced with a wooden grate.

If you still do not have a compact and comfortable sauna in your home, then it's time to take care of acquiring it, and if you have enough skills and experience, then do it yourself.